How Artisan Steam Deck Buttons are Made
3D Design and prototyping
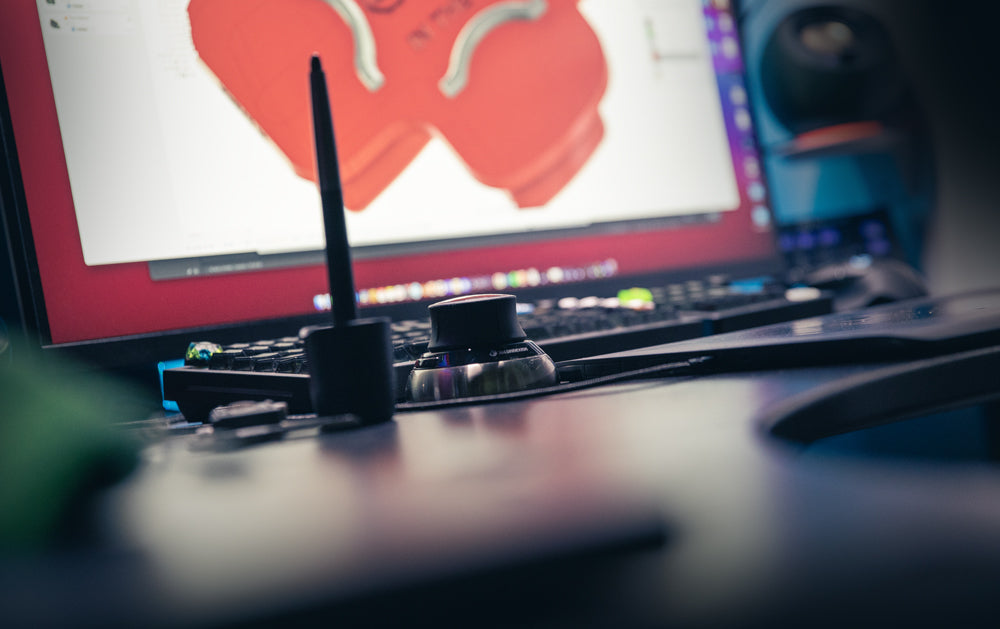
Our journey begins with a 3D file, meticulously crafted from scratch. Six months of rigorous testing and refining ensured that each button not only fit seamlessly, but also felt right to the touch.
This was the stage where I aimed to improve upon Valve's design.
- The "Menu" and "..." buttons saw multiple revisions to ensure they offered a tactile sensation, without disrupting the user's gameplay. We all know those stock buttons are a bit too mushy and hard to find without looking down. I didn't like that, and sought out a way to fix it.
- I also resolved the concern with the stock Start/Select buttons embedding into the shell, an issue Valve eventually corrected in later models.
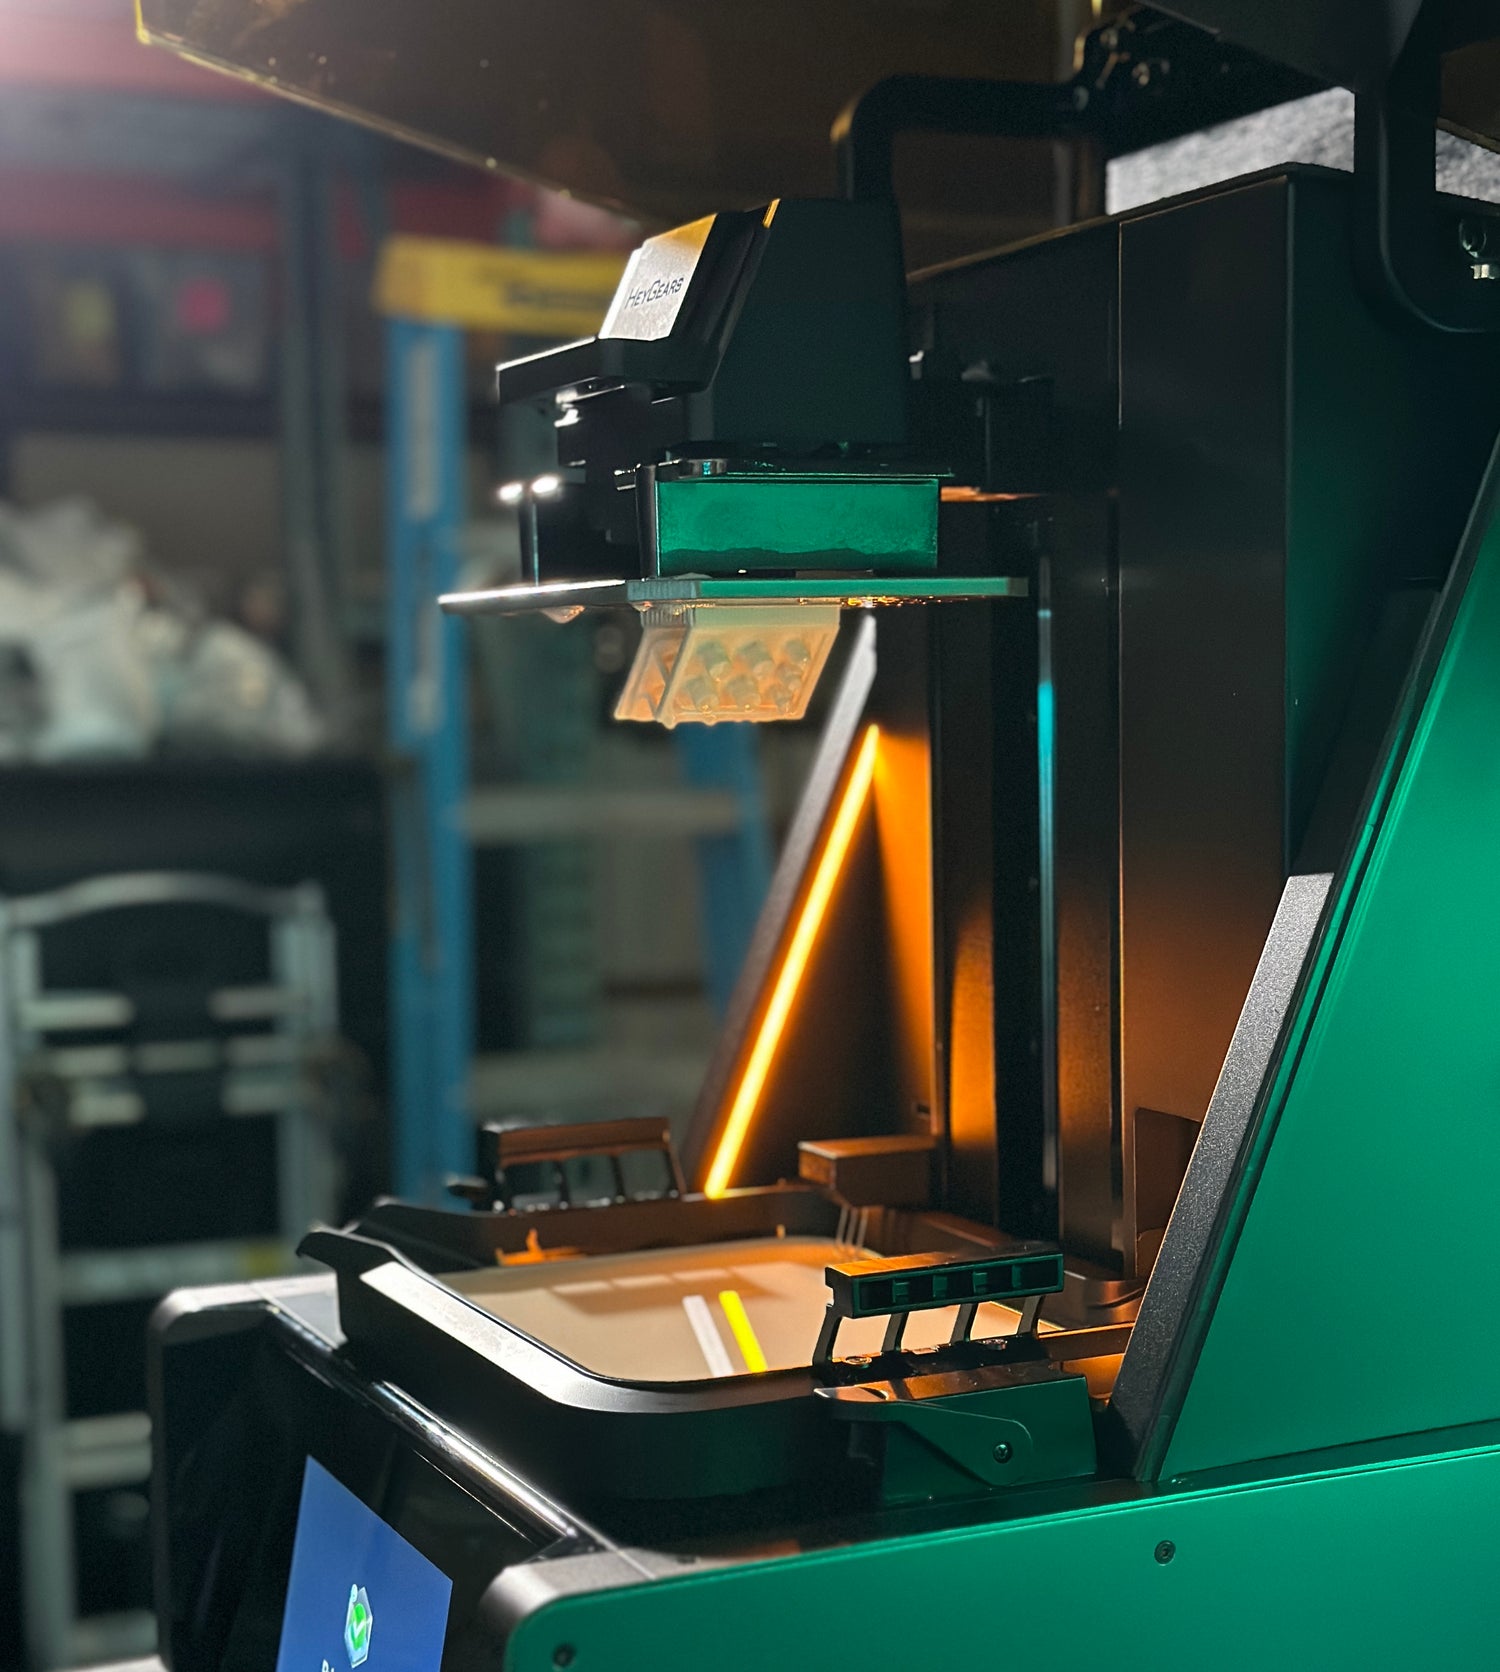
High Precision 3D Printing:
Each button begins as a 3D print, referred to as the "master." From this master prints, we then create molds that are used to produce the final buttons.
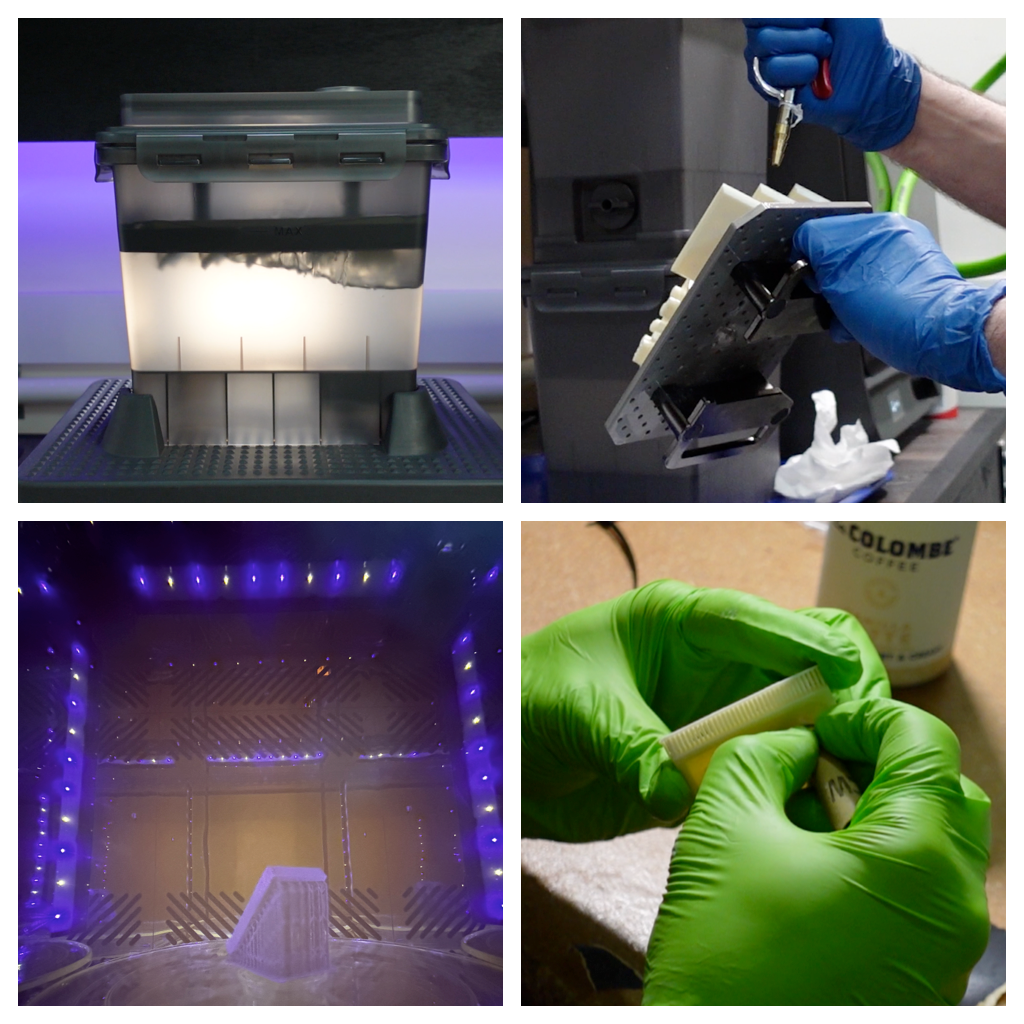
Post Processing:
Each 3D print undergoes a multi-step process to prepare the masters for casting. This includes extensive hand finishing and multiple quality checks throughout the process.
Time for Molds.
Each master snugly fits into its carrier, ready for the carefully hand-poured silicone.
- Undergoing a dual treatment of vacuum degassing followed by pressure pot curing, we take extra steps to produce molds that are uniformly smooth, without any air gaps or bubbles.
Each master cures between 6-12 hours.
- A lot of long hours and late nights were spent on designing this mold system. The end result is a uniform, accurate, and repeatable system that provides great results.
Resin Casting – The Heart of the Process:
You were probably wondering, when do the actual buttons happen? This is the exciting step!
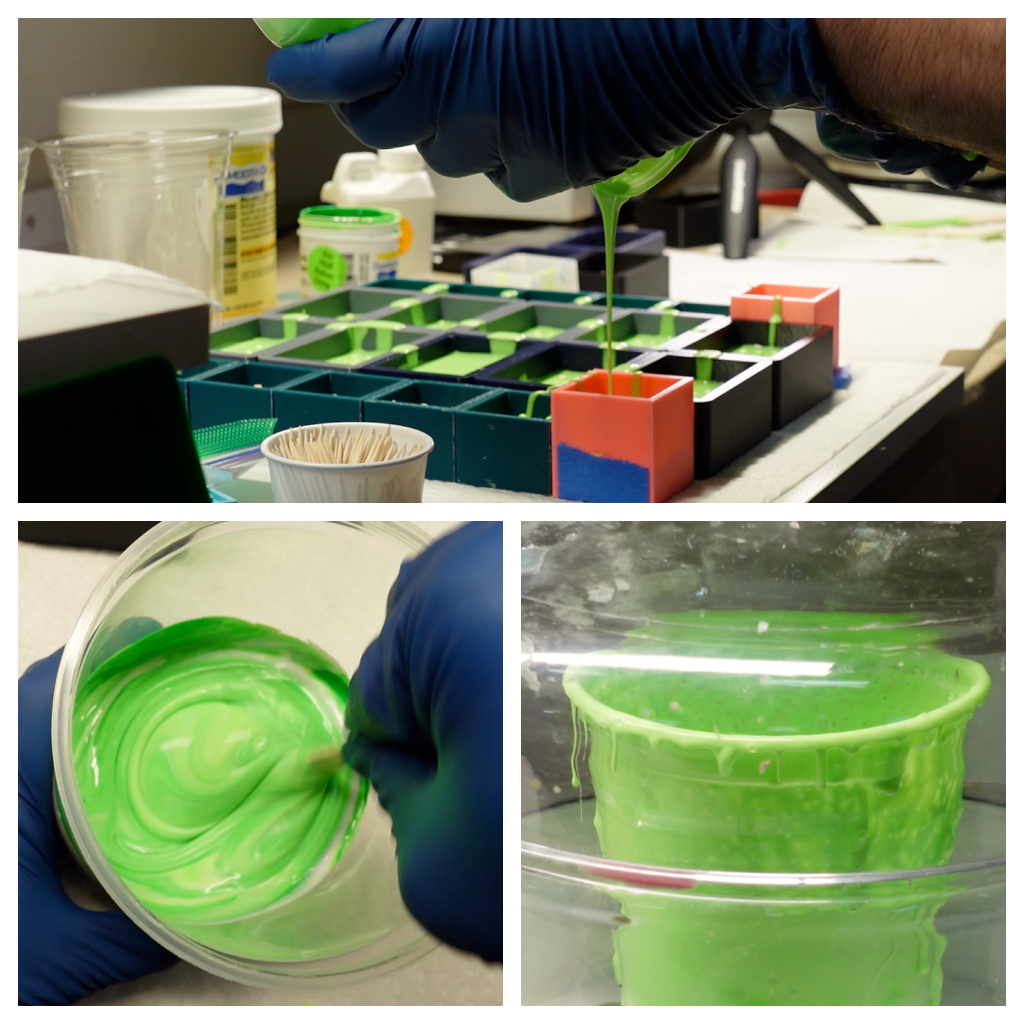
- Mixing up resin. All of our colors are mixed by hand using a variety of pigments, dyes, and other materials.
- Pouring into the molds. This can be as simple as adding some color and pouring, or get more complex with multi-part pours, encapsulating things, etc. Cure time can be anywhere from 1 hour to 6 depending on materials used here.
- Each pour requires curing in a pressure pot. Multiple colors and other effects require multiple cycles of pouring and curing.
- The second the resin is mixed up, it begins curing. Typically we have 5 min or less to get everything poured, the molds closed up, and under pressure.
Demolding. Finishing. Q/A and Packaging.
Once your buttons are cured, they are ready to be removed from the molds. What you end up with is a button with excess resin around it (called flashing) This occurs where the two halves of the molds meet.
The back of every button is hand sanded, sprues and flashing removed, and checked for any imperfections.
Once everything checks out, your buttons are packaged up and ready to be sent off!